4 Hugues Ross - Blog: Lua
Hugues Ross
Showing posts with label Lua. Show all posts

1/15/18

Adventures in GrafX2 Scripting

I'm currently working on a little game project. Since I want a relatively polished result, I have a lot of art assets to make. I'm spending many hours in my editor of choice, GrafX2, and I get the opportunity to see places where my workflow falls short. Sometimes, I want to do something but it's a little annoying because of the tools I use.

If I were nothing but an artist, then that would be the end. I'd either have to grit my teeth or move to another program. However, I'm a programmer and GrafX2 has a scripting API. I think you can see where I'm going with this.

Minor Troubles

There exists a pretty major roadblock for anyone who wants to get into GrafX2 scripting: There's no API documentation (As far as I can tell, at any rate). I spent my first 15 minutes or so trying to use the example scripts as reference, before getting fed up and tracking down the source code. As you can see here, there's one convenient spot in the codebase where you can find the relevant Lua functions. Thanks to my line of work, I'm already very used to reading code in place of docs so this made my work much simpler once I discovered it.

Another thing to be aware of is that GrafX2 always loads scripts when they're called. That means that all you need is an open copy of GrafX2, and you can regularly call your script for testing/debugging as you work. In my case, I set up my code and my editor side-by-side like so:
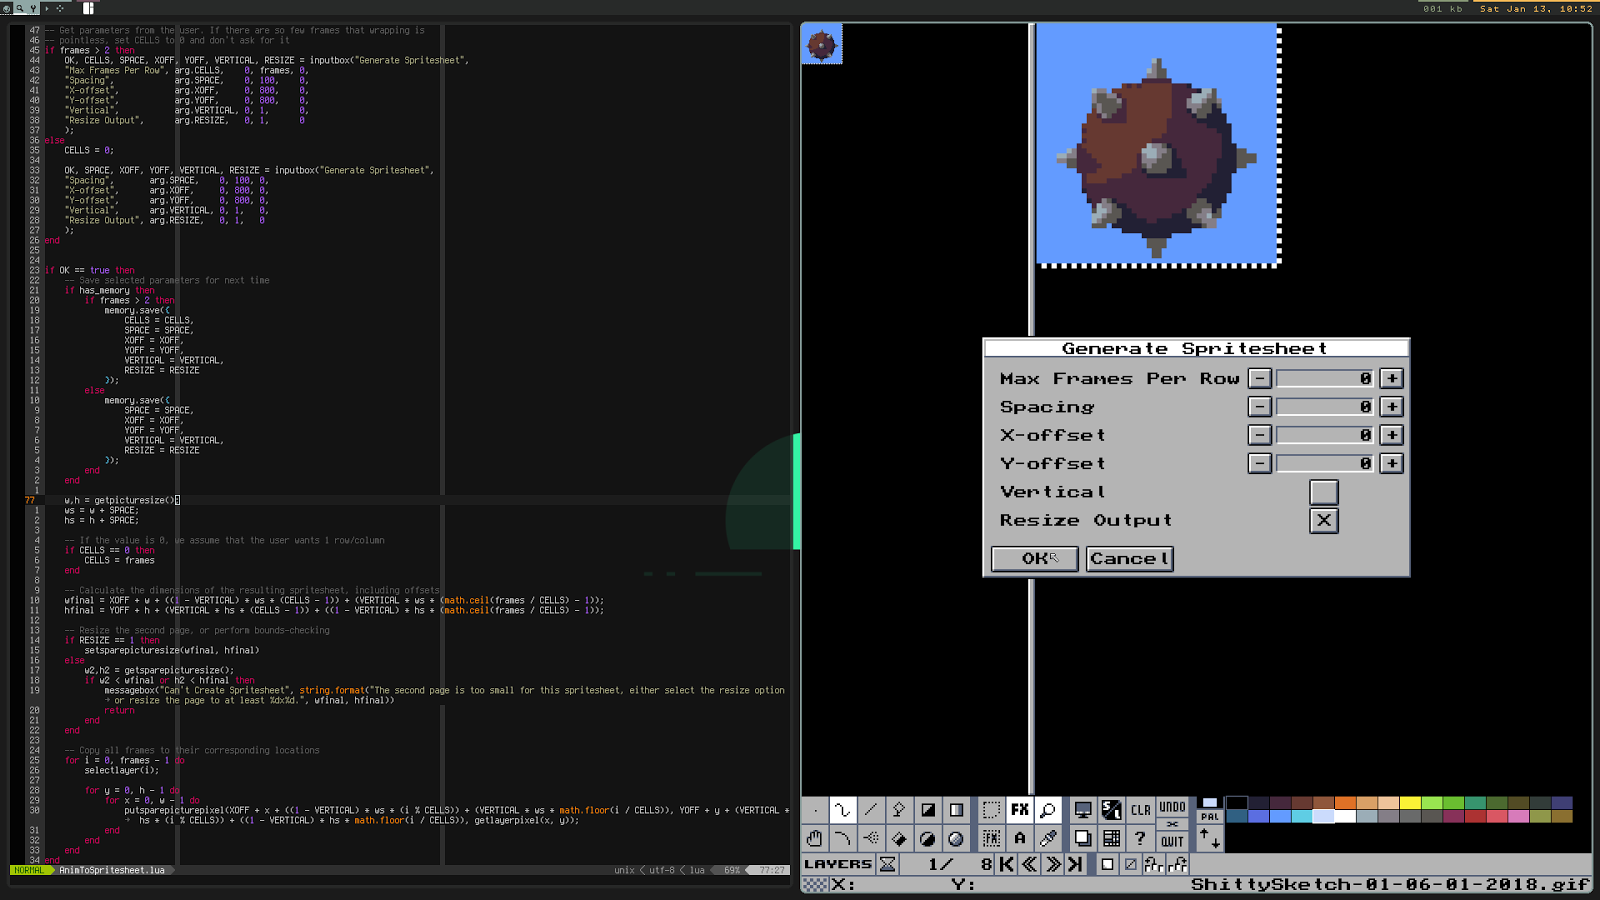
Click the image for a larger view

With these tools in hand, writing new scripts to improve my workflow is quite easy!

The Scripts

In the spirit of giving, I'm going to discuss the scripts that I've written and share them with the internet at large. All 3 or so GrafX2 users in existence can enjoy my work and rejoice!

If you just want the scripts and don't care about my chattering, click here now.

Animation to Spritesheet

This was my first and arguably most important script. GrafX2 generally exports animations as gifs which I have to go back and edit in GIMP to make them into spritesheets. This process is rather annoying, so I decided to make a script to do it automatically. Once that was done, I figured it might be worth my while to polish and release some scripts. (Technically, I still have to change the color mode to RGB in GIMP, but I plan to add indexed color support to dfgame sooner or later)

This script pretty just copies animation frames to the second page, and arranges them however the user asks. There are probably more options that I could add for more complex layouts, but it should cover most cases.

I recently noticed an issue with this script where it doesn't work occasionally. When that happens, you can probably just run it again and it'll work. The script's logic appears to be correct, so it may just be a GrafX2 bug. It's hard to tell for certain.

Zoom-in-Place

Zoom-in-Place, or ZinP as I like to call it, is a product of how I like to present my work. As you can see in this post, I like to place a zoomed version of my art next to the original. This is also useful for getting critique! Unfortunately, this is a little bit annoying to do manually. I could just take a screenshot, but that method is impossible for animations like this one:
That took about 2-3 seconds to produce, and most of those seconds were spent finding and starting up the script. It's probably even faster than spinning up a gif/video recorder, and unlike a recording this preserves the palette information correctly.

Append Page

Since I was on a roll, I decided to write another script. This 3rd script, Append Page, is pretty simple: It just copies information from the inactive page to the currently active one. Unlike the page copy in GrafX2, this script appends the copied data instead of replacing the original contents. The result leaves the two pages side-by side for easy comparison. Unlike a normal copy and paste, Append Page preserves layer information. As a result, you can easily compare two variations of the same image layer-by-layer without making several manual copies.

Conclusion

I'm aware that these scripts are fairly situational. Indeed, they're absolutely catered to my specific workflow. Honestly though, I think that brings up a really good argument for non-coders to learn just a little bit of scripting:

When you know the basics of scripting, you can take your tools and make them work just right. Maybe there's one little thing that annoys you here and there, or a minor little convenience feature you wish existed. When you know how to script, and your applications support doing so, there's nothing to stop you from solving your own problems and getting that perfect workflow.

Someday, I want to see a world where DIY scripting is regarded as normal enough for everyone to know just a little bit. It's awfully idealistic of me, but I think it'd be a nice thing to see. Programming can be awfully hard work, but just a little bit here and there can produce great results for relatively little trouble.

7/16/17

Getting Organized - 6 - Tick Tock

Hello again, dear readers. Once again, it's time to make my life a little more productive. In my previous post, I grappled with my computer a little bit in order to bring my to-do list up every morning. This month, I'm going to work on my time management a little.

When I mentioned that I wanted a timer back in May, I said that I wanted "I'd like something that fits with everything else". I'm not entirely sure how many purely hypothetical beers I drank before writing that thought, but looking back it sounds more like the mutterings of the local town loony than anything important. I assure you, however, that this strange little collection of words will make sense if you read the following two paragraphs. So, y'know, you can just skip them if you're up for a challenge.

So, if you've been reading these posts religiously then you'll know that I use Awesome to manage my desktop. This gives me lots of control and customization options, but also makes using "traditional" desktop apps cumbersome at times. In this case, a quick Google search will find you endless pages of linux timer apps, coming in exactly two flavors:
  1. Pretty (useless) dialog windows that take up half your screen with fancy Large Text
  2. Icons in your system tray
Option 1 is unappealing in general, but also breaks with my window-management preferences. I could let one of these apps ignore Awesome's tiling rules, but then it would also block me from interacting with whatever's underneath it. Oh, and it's definitely not getting its own special desktop, so that's out. Option 2 would work nicely...if I had a system tray. I could add one and watch it fill with useless incongruous icons, or I could not do that and sleep well at night. But, there's another solution. Let's take a look at my bar for a moment:
Pretty much all of those nice little UI bits are custom. So, I can make my own "Option 2" that fits with the visual style of my desktop and does exactly what I want.

If you're still following along with my little scheme to make a timer but you're not sure it's quick or feasible, then I have some good news: It's done. I secretly went and did it this morning. Normally, I write and code together, but I just wasn't in the mood for 6 AM blogging. What was in the mood for was Runescape (???), and I didn't want to miss any deadlines in the process. I suppose you could say I was motivated by laziness, but I'm not about to complain!

The Implementation

The result of my mad morning keyboard mashing was just under 100 lines of Lua code. Most of that is UI boilerplate, but there's about 40 lines of actual logic in there that might interest someone, so let's give that a look:
   52 local timer = gears.timer {
   53     timeout   = 1,
   54     autostart = false,
   55     callback  = function()
   56         seconds_left = seconds_left - 1
   57         if seconds_left == 0 then
   58             awful.spawn({"mplayer", "/home/df458/assets/se/Notify01.wav"});
   59 
   60             local message = string.format("Your timer of %02d:%02d has ended", math.floor(seconds_total/3600), math.floor(seconds_total%3600/60))
   61             if seconds_total < 3600 then
   62                 message = string.format("Your timer of %02d:%02d has ended", math.floor(seconds_total/60), seconds_total%60)
   63             end
   64             naughty.notify {
   65                 title = "Time's up!",
   66                 text = message,
   67                 timeout = 300
   68             }
   69         elseif seconds_left < 0 then
   70             widget:set_visible(false)
   71             timer:stop()
   72         end
   73         progress:set_value(1 - (seconds_left / seconds_total))
   74         if seconds_left < 3600 then
   75             label:set_markup(string.format("%02d:%02d", math.floor(seconds_left/60), seconds_left%60))
   76         else
   77             label:set_markup(string.format("%02d:%02d", math.floor(seconds_left/3600), math.floor(seconds_left%3600/60)))
   78         end
   79     end
   80 }
   81 
   82 function activate_timer(seconds)
   83     seconds_left = seconds
   84     seconds_total = seconds
   85     widget:set_visible(true)
   86     progress:set_value(0)
   87     if seconds_left < 3600 then
   88         label:set_markup(string.format("%02d:%02d", math.floor(seconds_left/60), seconds_left%60))
   89     else
   90         label:set_markup(string.format("%02d:%02d", math.floor(seconds_left/3600), math.floor(seconds_left%3600/60)))
   91     end
   92     timer:start()
   93 end
As you can see, this little code block could probably use some cleaning. With that said, it works pretty well and demonstrates just how easy it is to make a timer. All I really do is set two numbers to how many seconds I want to wait, then subtract one from the 1st number every second. The second number isn't even necessary at all, but I use it to add a progress indicator. Beyond that, the rest is just making a nice text representation that switches between hour:minute to minute:second as necessary. When the timer's running, my little info are looks like this:
It's simple, sure, but it works quite well! Next time, I'll be wrapping up this series with some final touches to task management.